Optimizing blast furnace iron trough by monitoring the refractory wear with 3d laser scanners
After many years of development, the root refractory product in the iron making process (and more specifically the blast furnace iron trough) has reached a high level of performance. Since our mindset has always been to overperform, we felt the need to implement digital tools in order to meet challenges such as enhanced safety and refractory usage.
3D laser scanner is the first answer to these challenges. By using the precise measurements that the scanner allows, it is easier to track the refractory consumption and enhance it. This will improve the service life for blast furnace's main iron troughs. Today and tomorrow’s technical tools and services will allow to counterbalance the lack of leverage in the current generation of refractory products (technological maturity). These technical tools and services serve the continuous optimization of the global refractory consumption.
3D laser scanners, a tool to build a long lasting database
Recently, with the popularization of high accuracy 3D laser scanners, it has been possible to digitize big objects, even buildings. The scans allow to measure precisely the extent of thermochemical and thermomechanical damages during a campaign.
More and more blast furnace managers are showing an interest for the new technologies to improve the global casthouse management. The objective is to keep under control and optimize the production schedule while ensuring an excellent level of reliability and safety (e.g. optimize the intervention schedule with the service life target). The device allows us to compare the profile before the production campaign to the ones after the campaign (giving the available refractory on the backlining after wrecking) but also the demolition impact. The refractory consumption can be tracked precisely.
Apart from the measurement, the use of the 3D laser scanner does present three advantages:
- High level of safety for people (no handley measurements in the trough / decrease of exposure to injuries like twisted ankles)
- Time saving
- Building an accurate and reliable database
The analysis of these measurements helps to optimize the areas for repair and is also useful to refine the iron trough design and the material choice (which improves Prorata contracts).
Recalibrating industrial processes to improve equipment efficiency.
During a campaign, several results can be obtained according to different behaviors such as:
- the blast furnace production is pushed so the limits of the impact area move
- the jet stream is not well calibrated so one side of the installation is predominantly consumed
- the chemical composition of hot liquids is changed so the depth of interfaces can be deeper
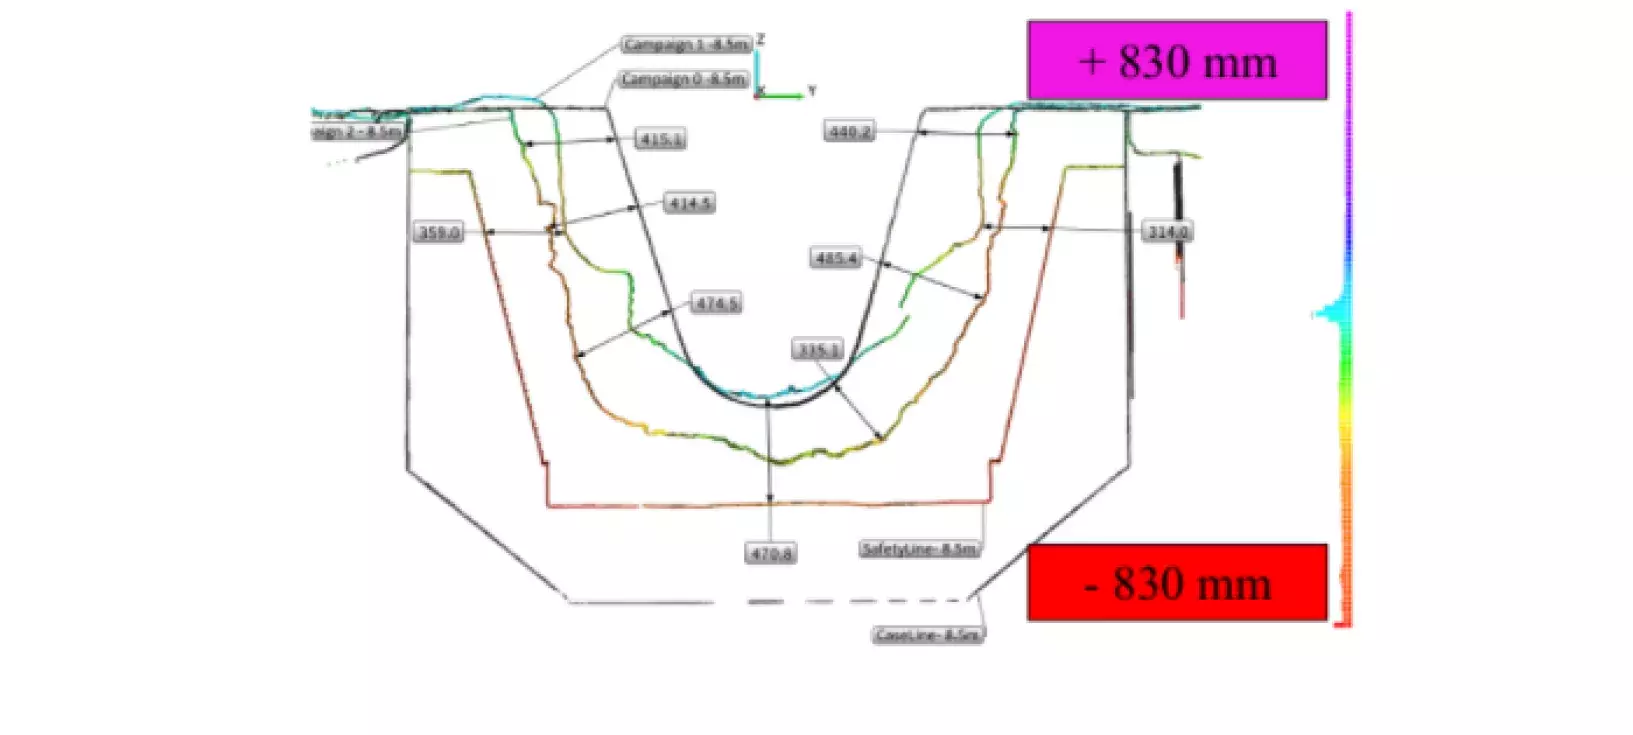
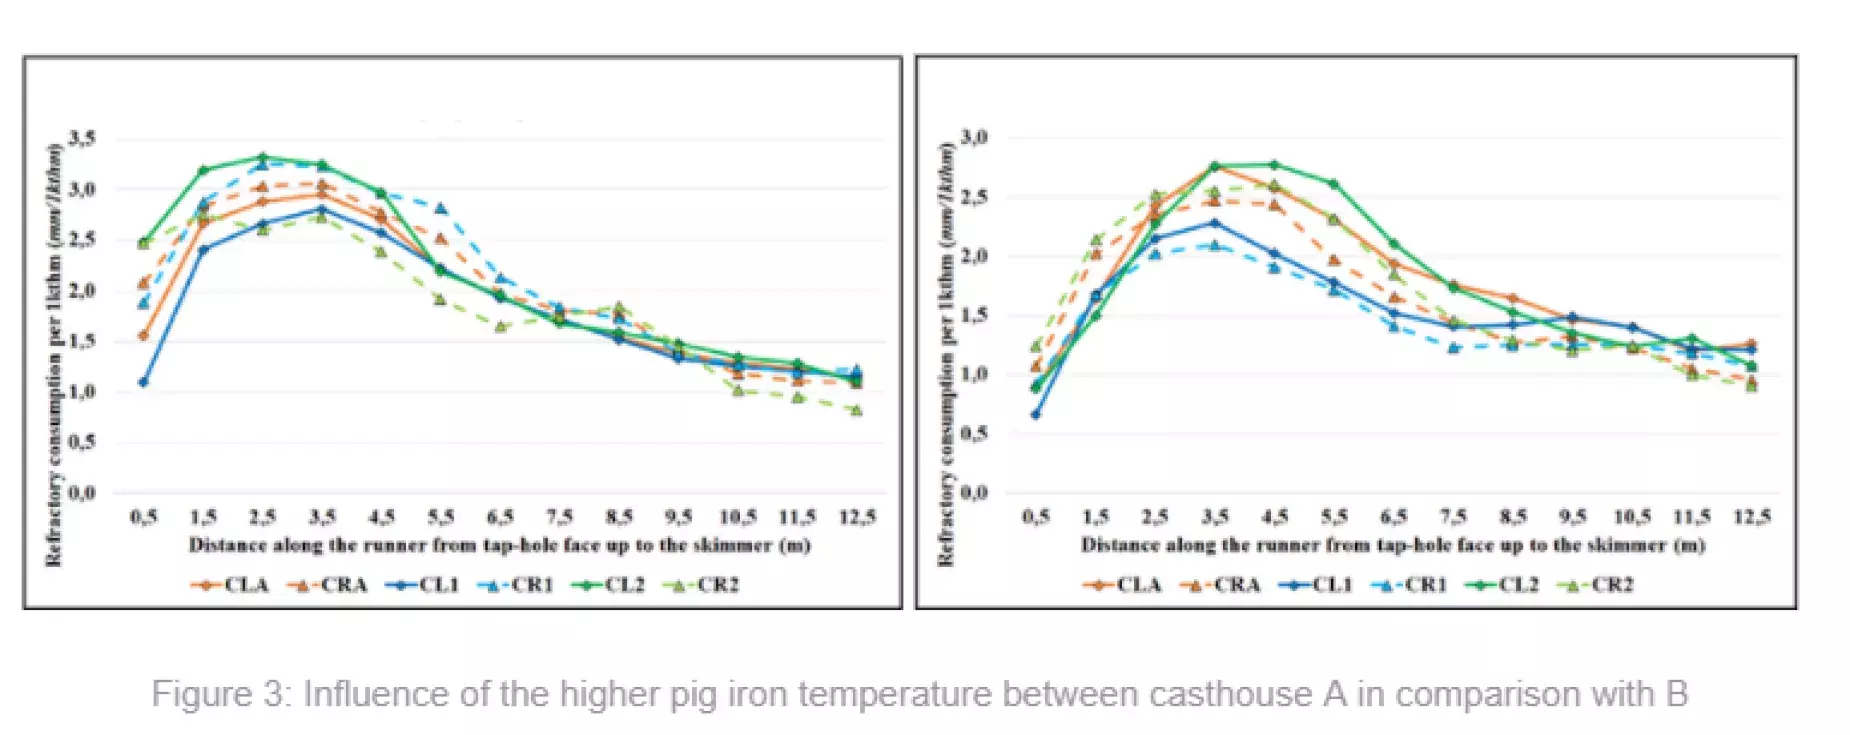
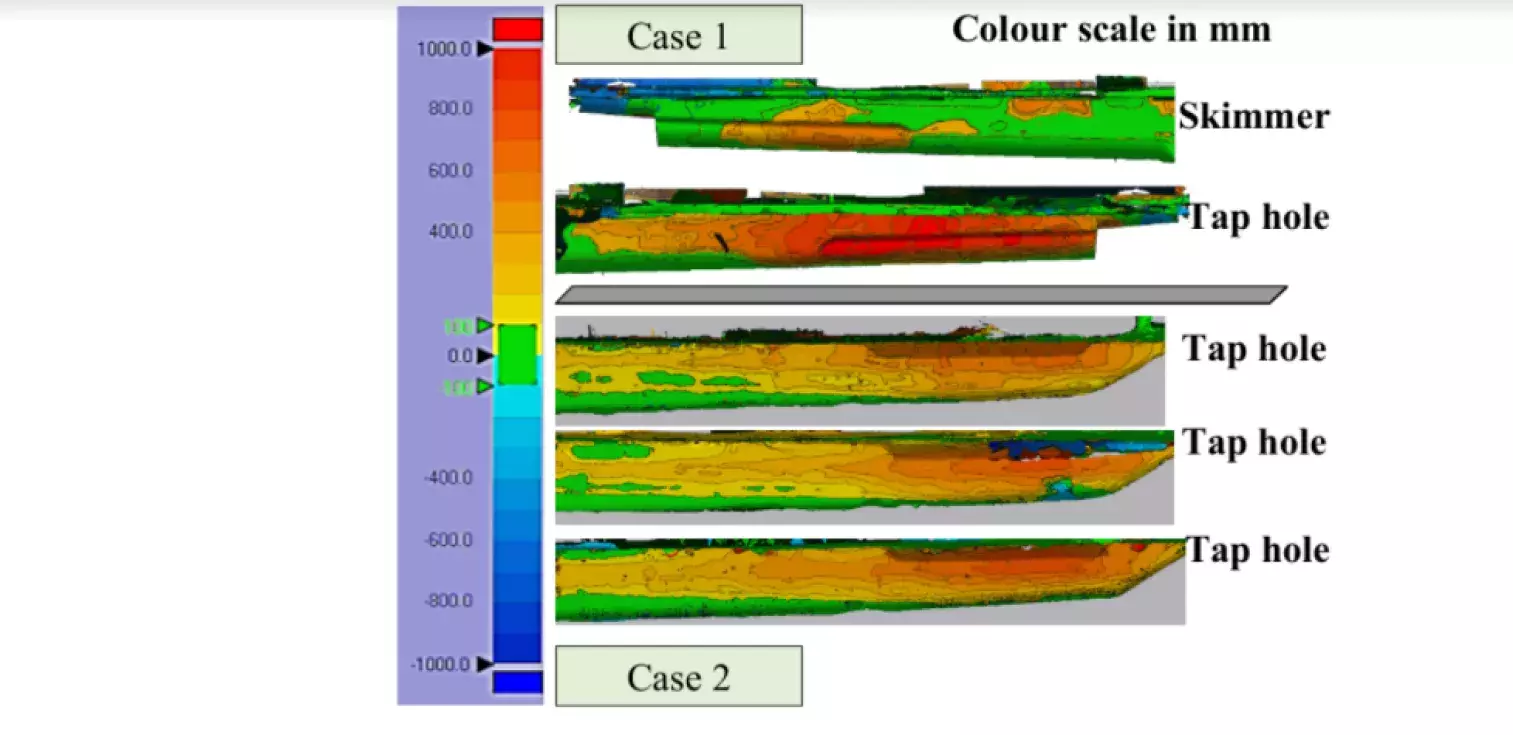
The analysis of the different profiles by the AMCR protocole (Acquisition, Modeling, Calculation and Report) helps us to identify the origin of the change and the output quality with 3D-mapping, 2D-projections and consumption kinetics. A couple examples of what our 3D laser scanners allow us to do can be found below:


Figure 2: Post-mortem analysis allows to improve the ratio lifetime/operating conditions

The device can be defined as a tool allowing to decrease the exposure of people to injuries as well as making analysis of data for a long period, bringing a high quality service for installation. On a daily basis, the 3D laser scanner is becoming a mandatory tool in order to show reliability between campaigns, increase the performance by targeting areas and decrease the installed quantity of castable.
By Mathieu Dombrowski, Technical Support Iron EMEA
Interested in our refractory products and digital solutions for your equipment? Contact Mathieu!


